Foodservice Equipment for K-12 Schools: A Planning Checklist
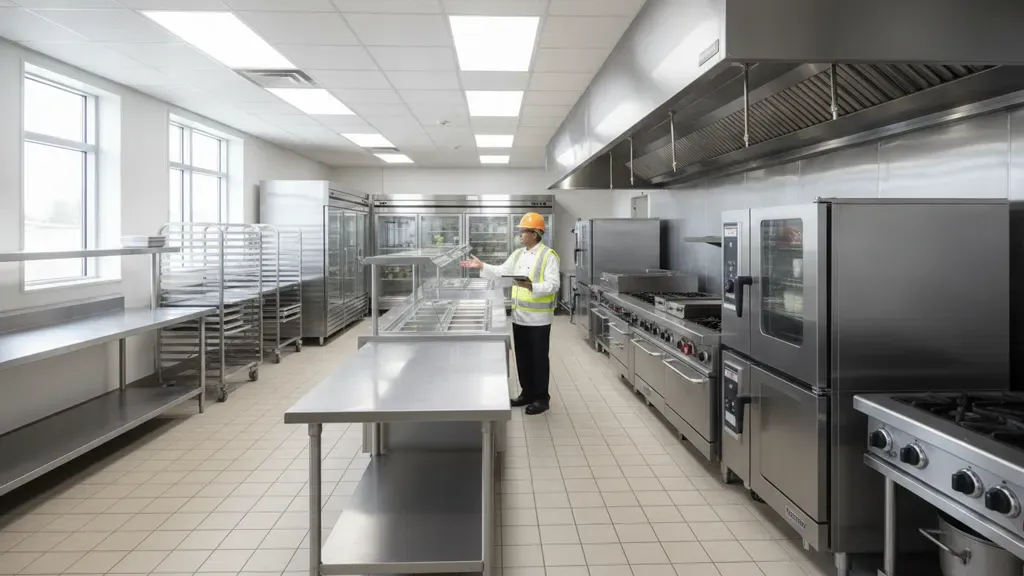
Planning foodservice equipment for K-12 schools takes more than listing ovens, refrigerators, and serving counters. The equipment package must support the meals your program serves, the number of students moving through the line. The time available for service, the building's utilities, and the staff's daily workflow.
Use this checklist before requesting quotes or finalizing a renovation. It will help a school nutrition director, facilities team, architect. Or purchasing group turn an operational need into a workable equipment and installation plan for a Rochester-area school or other institutional kitchen.
Talk with HRS commercial equipment experts about your school foodservice project.
How do you plan foodservice equipment for a K-12 school?
Start with the meal program and service workflow, then confirm space, utilities, sanitation, specifications, installation, and future capacity before selecting individual units. A good plan connects every equipment choice to a measurable job in the kitchen instead of treating the equipment list as a catalog.
Phase 1: Start with meals, students, and the service window
Write down what the kitchen must produce and serve on its busiest realistic day. The answer affects capacity, holding space, refrigeration, prep surfaces, and the number of staff positions needed.
- Meals and menu: List breakfast, lunch, snacks, special diets, scratch cooking, reheating, baking, and any satellite or after-school service.
- Volume: Record meals served per day, peak batches, average portions, and expected enrollment changes. Use production records rather than a guess based only on the number of seats.
- Service timing: Note how many minutes each grade group has to move through service, how many lines operate at once, and whether meals leave the kitchen in waves.
- Labor: Identify who receives deliveries, preps ingredients, cooks, portions, serves, cleans, and maintains records. Equipment should reduce unnecessary movement, not create extra handoffs.
Bring the school nutrition team, facilities staff, architect, and purchasing group into the planning process early. Their shared review helps connect the menu, workflow, facility, and purchase before the equipment schedule is finalized.
Phase 2: Map the workflow before choosing units
Sketch the path from receiving to storage, preparation, cooking, holding, service, warewashing, and waste removal. Keep clean and dirty paths as separate as the facility allows, and look for crossing traffic that could slow production or create sanitation problems.
- Receiving: Provide a practical place to inspect deliveries, stage ingredients, and move heavy items without blocking student or staff traffic.
- Storage: Separate dry storage, refrigerated storage, frozen storage, and nonfood supplies. Plan enough landing space around each storage area for safe loading and unloading.
- Preparation: Group prep sinks, worktables, cutting and mixing tools, food processors, and ingredient storage around the tasks staff perform together.
- Production: Place cooking equipment in a sequence that matches the menu and minimizes backtracking. Include landing space beside ovens, ranges, steam equipment, or other high-use units.
- Service: Plan the connection between hot and cold holding, portioning, point of service, and the student queue. Check that staff can replenish food and supplies without crossing the student line or interrupting service.
- Return and cleaning: Keep tray return, warewashing, drying, and waste movement away from clean food and ready-to-serve paths.
Phase 3: Build an equipment schedule by job
Convert the workflow sketch into an equipment schedule. Group each item by the job it performs, then record its required capacity, dimensions, utilities, accessories, quantity, and installation notes. This makes the schedule easier to compare with drawings and bids.
| Planning area | Questions to answer | Record before quoting |
|---|---|---|
| Cooking and baking | What menu items and batch sizes must the kitchen produce? | Capacity, production rate, footprint, ventilation needs, and accessories. |
| Cold and dry storage | How much product is held, and how often are deliveries received? | Usable capacity, shelf layout, door swing, temperature needs, and delivery access. |
| Prep and food storage | Where will staff wash, portion, mix, cut, and stage ingredients? | Work surface, sink type, equipment connections, carts, shelving, and cleaning access. |
| Holding and service | How will food stay ready during staggered service? | Pan or rack capacity, location, power, loading path, and service-line handoff. |
| Warewashing and sanitation | How will dishes, utensils, cookware, and food-contact surfaces be cleaned? | Sink or machine requirements, drain locations, drying space, chemical storage, and staff flow. |
Include small but operationally important items such as shelving, carts, racks, worktables, sinks, faucets, and equipment stands when they affect the workflow. A complete schedule helps the team see the full project rather than comparing only the largest appliances.
Review HRS commercial kitchen equipment categories as you build the equipment schedule.
Phase 4: Confirm utilities, clearances, and facility conditions
Do not approve a piece of equipment until the building can support it. Compare the equipment schedule with architectural and engineering drawings, existing conditions, and the planned installation route.
- Confirm electrical voltage, phase, amperage, disconnects, outlets, and panel capacity.
- Confirm gas type, pressure, connection size, shutoff access, and combustion-air requirements where applicable.
- Confirm hot and cold water supply, pressure, filtration needs, drains, floor sinks, and backflow protection.
- Confirm ventilation, hood dimensions, exhaust, make-up air, heat load, and fire-protection coordination.
- Measure doors, corridors, elevators, turns, ceiling heights, and service clearances before delivery.
- Check floor loading, wall conditions, curb or roof work, and whether equipment must be anchored or fixed in place.
Ask the project team to mark utility connections on the plan, not just in a separate equipment spreadsheet. This catches conflicts before rough-ins, flooring, or millwork make a correction expensive.
Phase 5: Write specifications that support a fair purchase
A school equipment specification should state what the program needs without narrowing the purchase to an unnecessary brand or model. Describe the performance, capacity, construction, utilities, dimensions, accessories, warranty requirements, delivery expectations, and acceptable options clearly.
New York State Education Department guidance on writing bid or purchasing specifications recommends language that is specific enough to identify the needed product without unnecessarily limiting competition. Use that discipline in each line of the schedule:
- Use a unique equipment number that matches the plan, schedule, and bid documents.
- State minimum performance and capacity requirements in measurable terms.
- List required dimensions, construction materials, utilities, clearances, and accessories.
- Separate mandatory requirements from options that may affect the bid.
- Define how the school will inspect the equipment at delivery and confirm that it matches the specification.
Phase 6: Check sanitation, safety, and local review
Health and building review should shape the plan early. In Monroe County, the official requirements for new or remodeled food service establishments advise submitting plans before construction and coordinating plan approval, permits, supporting documents, and opening inspection. Confirm the current requirements for the specific school and project with the reviewing authority.
- Show handwashing, food preparation, warewashing, mop, and other required sinks on the plan.
- Provide cleanable, durable surfaces and enough space to access, clean, and service equipment.
- Keep food, chemical, waste, and employee traffic paths logical and separated where required.
- Coordinate ventilation, fire protection, plumbing, electrical, and equipment plans before installation.
- Build inspection and correction time into the project schedule instead of treating approval as the last step.
This article is planning guidance, not a substitute for the current requirements of the authority reviewing the project. A local foodservice equipment partner can help identify questions for the design and purchasing team, but the school and its project professionals remain responsible for approvals.
Phase 7: Plan delivery, installation, training, and growth
The project is not complete when the equipment arrives. Assign an owner for each step from delivery through staff handoff.
- Confirm delivery timing, staging space, receiving access, and protection for finished floors and walls.
- Inspect model, quantity, dimensions, accessories, and visible condition against the approved schedule.
- Coordinate utility connections, start-up, testing, and any required commissioning.
- Train staff on normal operation, cleaning, safety, and who to contact for service questions.
- Save manuals, warranties, serial numbers, as-installed drawings, and maintenance instructions in one location.
- Document future needs, such as enrollment growth, menu changes, additional service periods, or a second serving line.
Before signing off, walk the kitchen during a simulated service. Have staff move through receiving, prep, production, holding, service, return, and cleaning in the planned order. A short shift test can reveal an obstructed cart path, missing landing surface, or poorly placed supply before the first meal is served.
What should be on the final K-12 equipment checklist?
The final checklist should connect each piece of equipment to a job, location, utility, specification, responsible owner, and verification step. Use these fields for the final review:
- Equipment number, description, quantity, and responsible planning owner.
- Room or zone, plan reference, dimensions, access route, and required clearances.
- Capacity, performance, construction, accessories, and acceptable options.
- Electrical, gas, water, drain, ventilation, heat, anchoring, and fire-protection requirements.
- Delivery, installation, commissioning, training, cleaning, and service notes.
- Bid status, approval status, expected delivery, receiving check, and open question.
- Future capacity note explaining what happens if meal volume, menu, or service timing changes.
Frequently asked questions
When should a school start planning foodservice equipment?
Start during programming or early schematic design, before utilities, walls, millwork, and service routes are fixed. Early planning gives the school team time to compare workflow, capacity, installation access, and future growth.
What is the most important information for selecting school kitchen equipment?
Begin with peak meals, menu and production methods, service timing, staff workflow, available space, and building utilities. Those facts are more useful than choosing a model from a product list first.
How detailed should a school foodservice equipment specification be?
It should be detailed enough to state required capacity, performance, construction, dimensions, utilities, accessories, installation conditions, and receiving checks. Keep optional features separate from requirements so the purchasing team can compare bids fairly.
Can a Rochester-area equipment supplier help with a school project?
Yes. HRS serves Rochester and Western New York foodservice operations with commercial equipment, supplies, and kitchen planning support. Contact the HRS team early so the equipment schedule can be reviewed alongside workflow, utilities, and installation needs.